How to Start Composting at Home
A practical guide to backyard composting. Learn which bin to use, what to compost, how to fix common problems, and when your compost is ready.
Key takeaways
- Maintain a 3:1 ratio of brown materials to green materials by volume
- Turn your compost pile every 1-2 weeks to speed up decomposition
- A hot compost pile reaches 130-160F and finishes in 2-4 months
- Never compost meat, dairy, or pet waste in a backyard bin
- Finished compost saves $30-50 per cubic yard compared to store-bought amendments
Why every gardener should compost
Composting turns kitchen scraps and yard waste into the single best soil amendment you can get. Finished compost improves soil structure, feeds beneficial microorganisms, helps soil hold moisture, and provides slow-release nutrients that synthetic fertilizers cannot match.
The average US household throws away roughly 400 pounds of organic waste per year, according to the EPA. That material ends up in landfills where it produces methane, a greenhouse gas 80 times more potent than carbon dioxide over a 20-year period. Composting at home keeps that waste out of the landfill and puts it to work in your garden.
Finished compost also saves money. A cubic yard of quality compost costs $30-50 at a garden center. A 3x3 foot backyard bin produces roughly one cubic yard of finished compost per year from materials you were going to throw away.
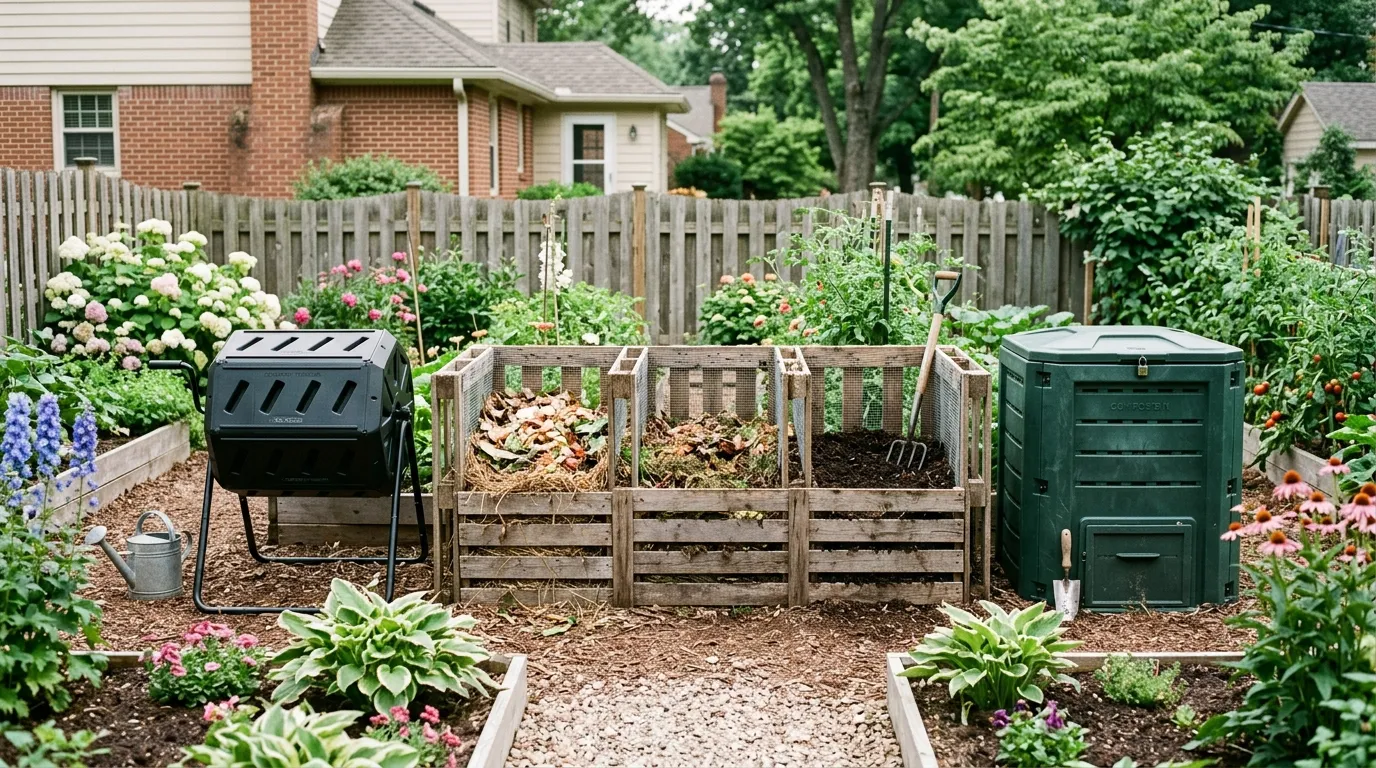
Choosing a compost bin
You do not need fancy equipment to compost. A simple pile on bare ground works fine. But a bin keeps things tidy, retains heat, and discourages animals.
| Bin type | Cost | Capacity | Speed | Best for |
|---|---|---|---|---|
| Open pile | Free | Unlimited | Slow | Large yards, rural areas |
| Wire mesh ring | $15-25 | 1 cubic yard | Medium | Budget option, easy turning |
| Wooden three-bin | $50-150 | 3 cubic yards | Fast | Serious gardeners, large volumes |
| Plastic tumbler | $80-200 | 5-10 cubic ft | Fast | Small yards, rodent concerns |
| Stationary plastic bin | $40-100 | 8-12 cubic ft | Medium | Suburban yards, beginners |
| Worm bin (vermicompost) | $40-80 | 2-4 cubic ft | Medium | Apartments, kitchen scraps only |
For most beginners, a stationary plastic bin like the Earth Machine or a basic wire mesh ring is the best starting point. They are cheap, simple, and produce good compost with minimal effort.
For faster results, tumbler bins let you spin the entire contents every few days, mixing air into the pile without using a pitchfork. Most tumblers produce finished compost in 4-8 weeks during warm weather.
For apartments and condos, a worm bin (vermicomposting) fits under a sink or on a balcony. Red wiggler worms eat kitchen scraps and produce worm castings, which are even richer in nutrients than regular compost.
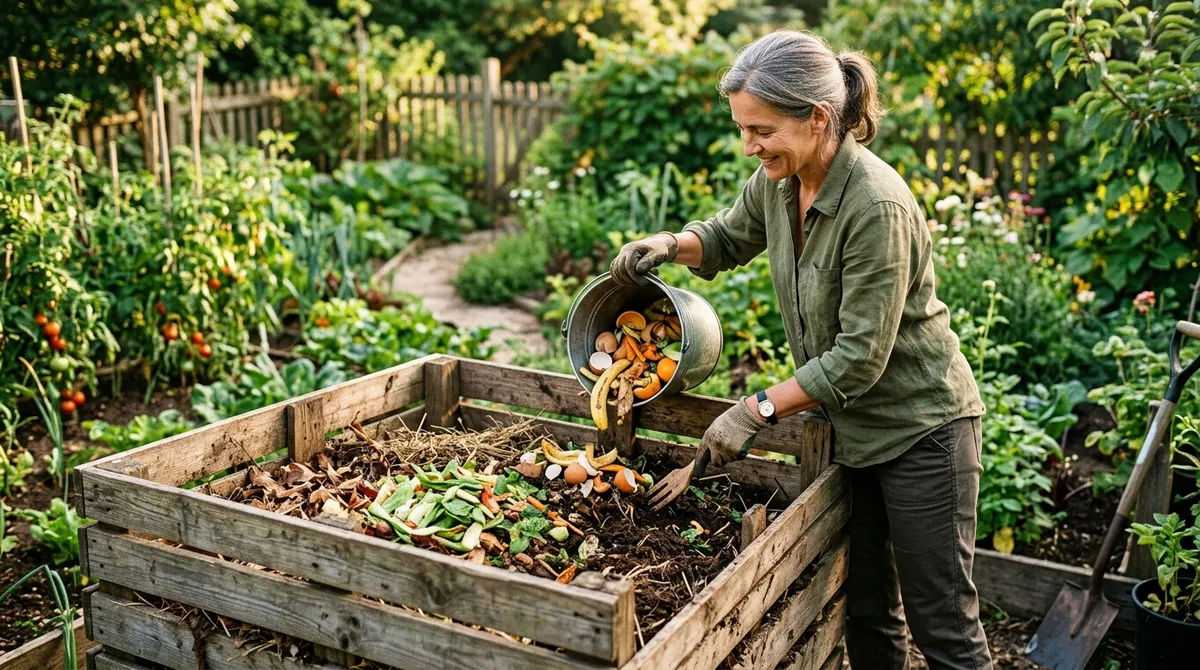
Location matters. Place your bin on level, bare ground in a spot with partial shade. Full sun dries out the pile too fast. Full shade keeps it too cool. A spot near your kitchen door makes it easy to drop off scraps.
What to compost
Compost ingredients fall into two categories: greens (nitrogen-rich) and browns (carbon-rich). You need both in the right ratio for the pile to heat up and decompose efficiently.
Green materials (nitrogen)
- Fruit and vegetable scraps
- Coffee grounds and paper filters
- Fresh grass clippings
- Plant trimmings and spent flowers
- Tea bags (remove staples)
- Eggshells (crush them first)
Brown materials (carbon)
- Dry leaves
- Shredded cardboard and paper
- Straw or hay
- Wood chips and sawdust (untreated wood only)
- Dryer lint (from natural fiber clothes)
- Corn stalks and cobs
Never compost these
- Meat, fish, and bones
- Dairy products
- Cooking oil and grease
- Pet waste (dog and cat)
- Diseased plants
- Weeds that have gone to seed
- Treated or painted wood
- Coal or charcoal ash
The golden rule is a 3:1 ratio of browns to greens by volume. Three buckets of dry leaves for every one bucket of kitchen scraps. Too many greens make the pile slimy and smelly. Too many browns make it dry and slow.
Building your first compost pile
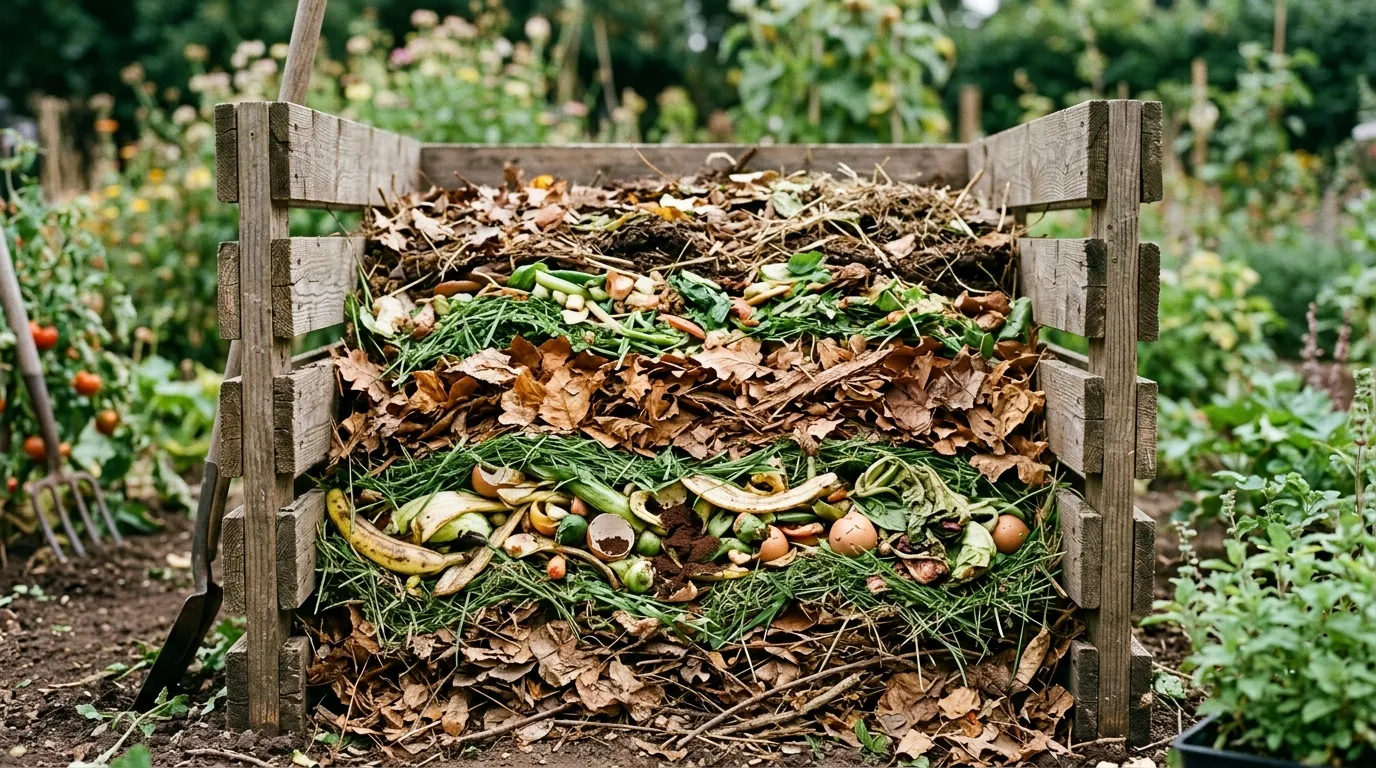
Start with a 6-inch layer of coarse brown material at the bottom. Sticks, small branches, or corn stalks work well. This base layer creates air channels underneath the pile.
Add a 2-3 inch layer of green material on top. Kitchen scraps, fresh grass clippings, or garden trimmings are all good choices.
Cover the greens with a 6-inch layer of browns. Shredded leaves are ideal because they break down quickly and do not mat together like whole leaves.
Keep alternating thin green layers with thick brown layers. Water each layer as you build so the pile is moist throughout, like a wrung-out sponge. Not dripping wet, just damp.
A compost pile needs to be at least 3 feet wide and 3 feet tall to generate enough heat for efficient decomposition. Smaller piles decompose too slowly because they cannot retain heat.
Managing the pile
Turning
Turning introduces oxygen, which feeds the aerobic bacteria doing the decomposition work. Without air, the pile goes anaerobic and starts to smell like rotten eggs.
Hot composting: Turn the pile every 7-10 days with a garden fork. Move material from the outside to the center where it is hottest. A properly managed hot pile reaches 130-160F internally and produces finished compost in 2-4 months.
Cold composting: If you prefer less work, just keep adding material and let the pile sit. It takes 6-12 months but requires almost no effort.
Moisture
The pile should feel like a damp sponge when you squeeze a handful. If water drips out, it is too wet - add more browns. If it feels dry and crumbly, water it or add more greens.
During dry spells, water the pile when you turn it. During heavy rain, cover it with a tarp to prevent waterlogging.
Temperature
A working hot compost pile feels warm to the touch on the outside and steaming when you dig into the center. Temperatures above 130F kill weed seeds and plant pathogens. A compost thermometer ($10-15 at garden centers) takes the guesswork out.
| Problem | Cause | Fix |
|---|---|---|
| Pile smells like ammonia | Too many greens | Add browns, turn the pile |
| Pile smells like rotten eggs | Too wet, no air | Turn the pile, add dry browns |
| Pile is not heating up | Too dry or too small | Add water, add more material |
| Pile attracts fruit flies | Exposed food scraps | Bury scraps under browns |
| Pile is attracting rodents | Meat or dairy in pile | Remove offending material, use enclosed bin |
| Material is not breaking down | Pieces too large | Chop or shred before adding |
Troubleshooting common problems
Bad smells are the number one complaint from new composters and almost always mean the pile is too wet or has too many greens. Add a generous layer of dry leaves or shredded cardboard and turn the pile. The smell should clear up within two to three days.
Fruit flies appear when food scraps sit exposed on the surface. Always bury fresh scraps under 4-6 inches of brown material. A layer of finished compost or soil on top also works.
Slow decomposition usually means the pile is too dry, too small, or not being turned. Check moisture, add material to increase the pile size, and turn it weekly. Chopping large items like melon rinds and corn cobs into small pieces speeds things up noticeably.
Animals getting in means you need a more secure bin. Switch to a tumbler or add hardware cloth (1/4 inch mesh) to the bottom and sides of your bin. Never add meat, fish, or dairy to an open compost pile.
Matted grass clippings form a slimy layer that blocks air flow. Mix grass with dry leaves or straw before adding it to the pile, or spread it in thin layers alternating with browns.
Using finished compost
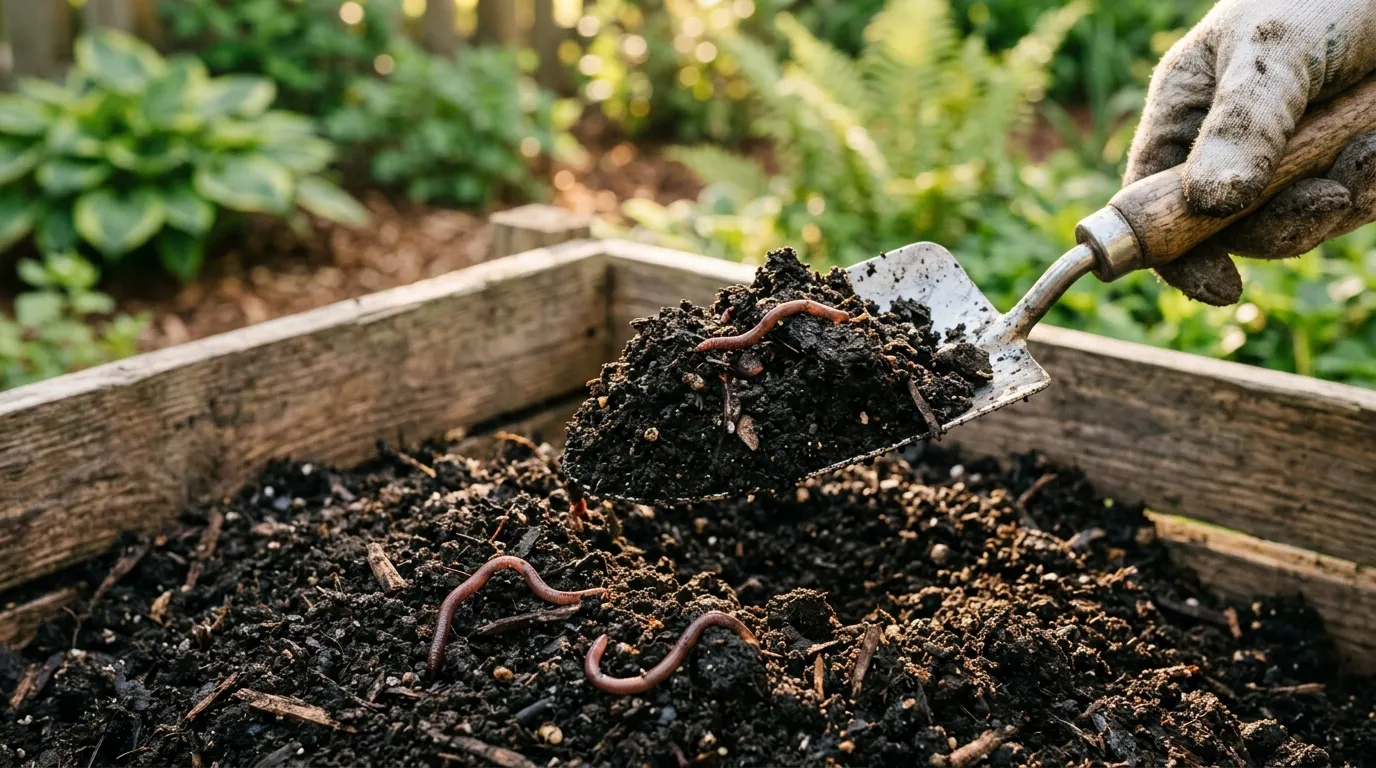
Finished compost looks and smells like rich, dark soil. You should not be able to identify any of the original materials. It crumbles easily in your hand and has an earthy smell with no trace of ammonia or rot.
If your compost still has recognizable chunks, screen it through 1/2 inch hardware cloth. The fine material goes to your garden; the chunks go back in the bin for more time.
In garden beds: Spread 1-2 inches of finished compost on top of the soil and work it into the top 6-8 inches. Do this in spring before planting or in fall after cleanup.
As mulch: Apply a 2-3 inch layer around established plants. Compost mulch feeds the soil while suppressing weeds and retaining moisture.
For potting mix: Blend one part finished compost with one part perlite and one part peat moss or coco coir for a nutrient-rich container growing medium.
On lawns: Top-dress your lawn with a 1/4 inch layer of screened compost in spring or fall. It feeds the grass and improves the soil underneath without smothering the turf.
Scaling up your composting
Once you get comfortable with one bin, consider upgrading to a three-bin system. The first bin holds fresh material, the second holds partially decomposed material, and the third holds finished compost ready to use. You rotate material through the system, always having finished compost available.
A three-bin system built from wooden pallets costs under $20 in materials and handles all the yard and kitchen waste a typical household generates. Place it in a convenient spot and you will never buy bagged compost again.
For gardeners with limited space, a worm bin supplements your outdoor compost. Red wiggler worms process kitchen scraps year-round, including through winter when outdoor piles slow down. Worm castings are especially potent for container plants and seed starting.
Track what goes in and what comes out. A household of four typically produces 5-7 pounds of compostable material per week. Over a year, that converts to roughly one cubic yard of finished compost, enough to amend 200-300 square feet of garden bed.
Sarah Mitchell is a Master Gardener and garden writer based in the Pacific Northwest. She has been growing food and flowers for over 15 years across USDA zones 7 and 8.